The moment that perfectly seasoned chicken hits the hot air fryer basket, a quiet sizzle begins—and 15 minutes later, you’re slicing into the juiciest chicken breast you’ve ever made at home.
Air frying has transformed weeknight cooking, turning what used to be a dry, tricky protein into something consistently tender and flavorful. Boneless chicken breast, once notorious for overcooking, becomes incredibly forgiving with the right technique.
This method builds on simple pantry spices, smart timing, and one crucial trick that locks in moisture. You’ll get golden edges, a juicy center, and bold flavor without needing heavy sauces or hours of prep.
By the end, you’ll know exactly how to air fry chicken breast boneless so it stays moist every single time. From prep to plate, this recipe takes under 30 minutes and works for meal prep, salads, wraps, or a quick dinner.
Now let’s make something incredible.
Recipe Snapshot
| Detail | Info |
|---|---|
| ⏱️ Prep Time | 10 minutes |
| 🔥 Cook Time | 14 minutes |
| 🕐 Total Time | 24 minutes |
| 🍽️ Servings | 4 people |
| 📊 Difficulty | Easy |
| 🌎 Cuisine | American / Modern Healthy |
| 🔥 Calories | ~280 kcal per serving |
| 🥗 Dietary Tags | High-Protein, Low-Carb, Gluten-Free |
| 💰 Estimated Cost | $8–$12 for 4 servings |
| 🍳 Equipment Needed | Air fryer, tongs, meat thermometer |
Why You’ll Love This Recipe
- 🔥 Maximum flavor with minimal effort
The spice blend creates a savory crust while the air fryer locks in juices. You get that lightly crisp exterior and tender interior without deep frying. - ⏱️ Dinner in under 25 minutes
From fridge to plate faster than takeout, this recipe is perfect for busy weeknights when you still want something homemade and satisfying. - 👩🍳 Nearly impossible to mess up
With one simple timing rule and a temperature check, you avoid dry chicken forever. Even beginners can nail this on the first try. - 💰 Budget-friendly protein powerhouse
Chicken breast is one of the most affordable lean proteins, and this recipe uses pantry staples you likely already have. - 🥗 Healthy without sacrificing taste
You use minimal oil, yet still achieve a satisfying texture. It’s high-protein, low-carb, and fits into most healthy eating plans. - 🔄 Incredibly versatile
Slice it for salads, dice it for bowls, or serve whole with sides. This becomes your go-to base for dozens of meals. - 👨👩👧 Family-approved every time
The seasoning is balanced and approachable, making it a safe win for both kids and adults.
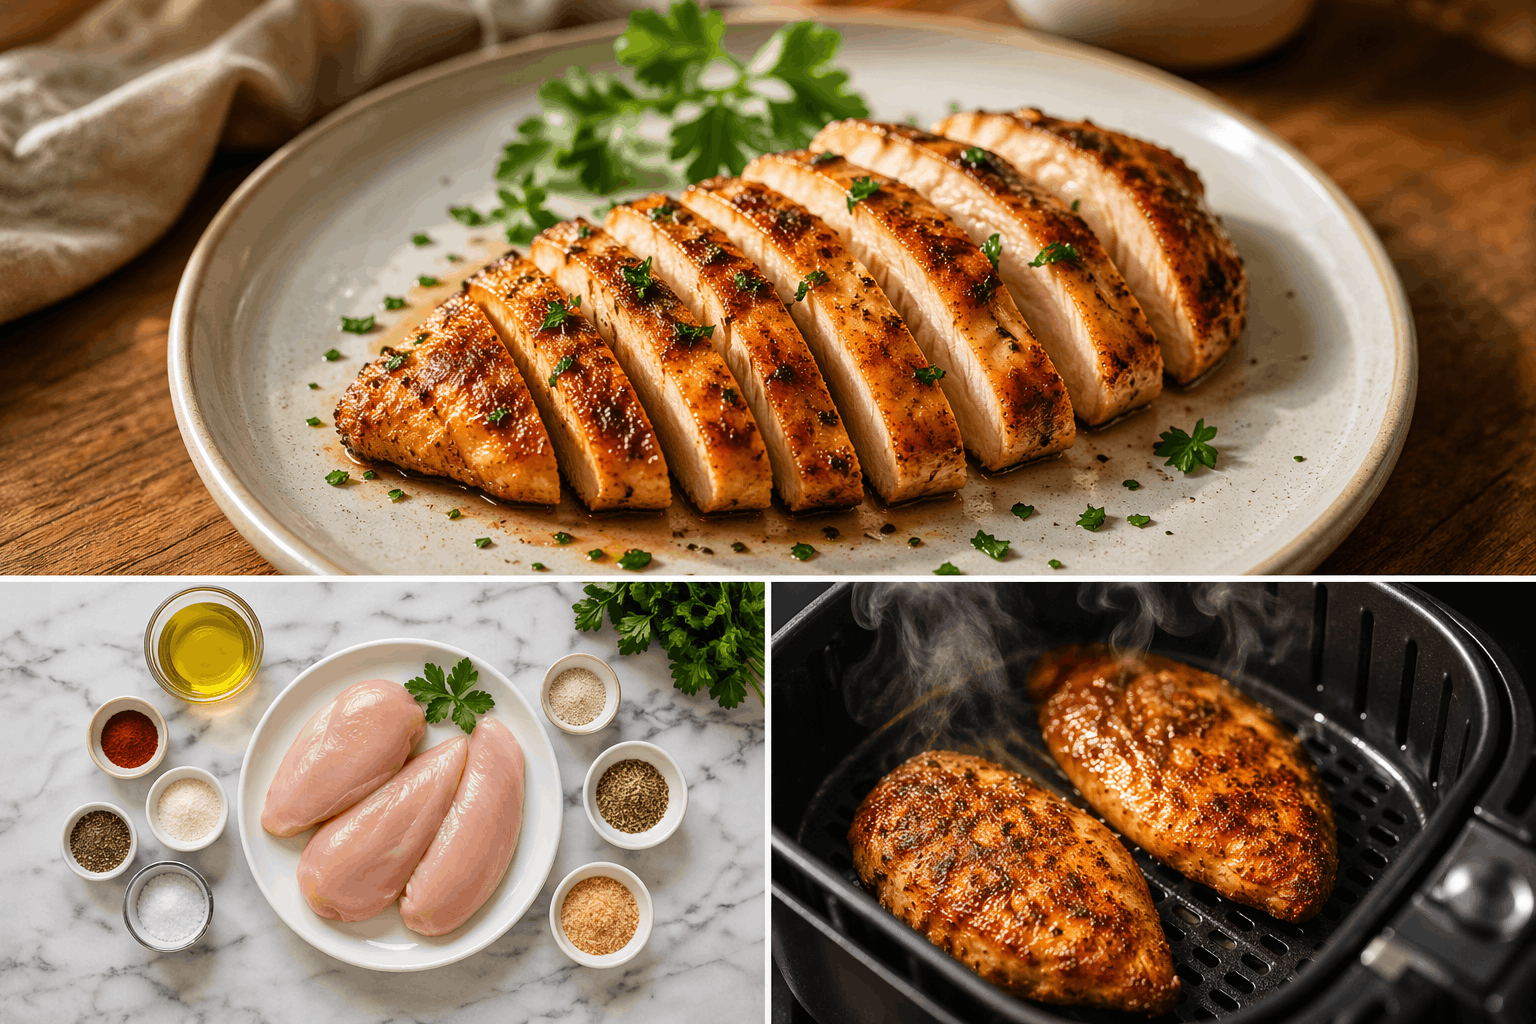
Ingredients
For the Chicken
| Ingredient | Amount | Notes & Substitutions |
|---|---|---|
| Boneless chicken breast | 680 g / 1.5 lb | Trimmed, evenly sized |
| Olive oil | 2 tbsp / 30 ml | Avocado oil works well |
| Kosher salt | 1 tsp / 5 g | Adjust to taste |
| Black pepper | ½ tsp / 2 g | Freshly ground preferred |
For the Seasoning Blend
| Ingredient | Amount | Notes & Substitutions |
|---|---|---|
| Garlic powder | 1 tsp / 3 g | Or fresh minced garlic (optional) |
| Paprika | 1 tsp / 3 g | Smoked paprika adds depth |
| Onion powder | 1 tsp / 3 g | Essential for savory flavor |
| Dried oregano | ½ tsp / 1 g | Italian seasoning substitute |
| Chili powder | ½ tsp / 1 g | Optional for mild heat |
| Brown sugar | 1 tsp / 5 g | Optional, adds caramelization |
Optional Garnish
| Ingredient | Amount | Notes & Substitutions |
|---|---|---|
| Fresh parsley | 2 tbsp / 8 g | Adds freshness |
| Lemon wedges | 1 lemon | Brightens flavor |
Ingredient Notes
Chicken Breast
This is the star, so size matters. Even thickness ensures even cooking. If one end is thick, gently pound it for consistency. Substitute with chicken thighs for a juicier result.
Paprika
Adds color and mild sweetness. Smoked paprika brings a deeper, slightly smoky flavor that mimics grilled chicken.
Olive Oil
Helps seasoning stick and promotes browning. You can swap with avocado oil for a higher smoke point.
Brown Sugar (Optional)
Creates subtle caramelization and balances spices. If avoiding sugar, skip it or use a pinch of honey.
💡 Smart Shopping Tip
Choose chicken breasts that are similar in size and thickness—this prevents uneven cooking. Avoid “woody” chicken (very firm texture) by buying from trusted brands or butchers.
Before You Start — Quick Prep Checklist
- ✅ Remove chicken from fridge 15 minutes early — this helps it cook evenly instead of drying out on the outside.
- ✅ Pat chicken completely dry — moisture prevents proper browning and seasoning adhesion.
- ✅ Preheat your air fryer to 190°C / 375°F — starting hot ensures a good sear.
- ✅ Measure all spices beforehand — the process moves quickly once you start.
- ✅ Lightly oil the basket — prevents sticking and tearing the surface.
- ✅ Have a thermometer ready — precision is the difference between juicy and dry.
Professional chefs call this mise en place — everything in its place. It is the single habit that will make you a better cook immediately.
Step-by-Step Instructions
Step 1 — Preheat the Air Fryer
PREHEAT your air fryer to 190°C / 375°F for 3–5 minutes until you feel heat when you open it. 👃
⭐ PRO TIP: Preheating ensures immediate searing, which locks in juices.
Step 2 — Dry the Chicken
PAT the chicken breasts dry with paper towels for 1 minute until the surface feels slightly tacky. ✋
⚠️ WATCH OUT: Skipping this step leads to steaming instead of crisping.
Step 3 — Oil the Chicken
DRIZZLE olive oil evenly over the chicken and rub for 30 seconds until glossy. 👁️
Step 4 — Mix the Seasoning
COMBINE all spices in a small bowl for 30 seconds until evenly blended. 👁️
Step 5 — Season the Chicken
RUB the seasoning mixture onto the chicken for 1 minute until fully coated. 👁️
⭐ PRO TIP: Press seasoning firmly so it forms a crust during cooking.
Step 6 — Arrange in Basket
PLACE chicken in a single layer in the air fryer basket for 30 seconds, leaving space between pieces. 👁️
⚠️ WATCH OUT: Overcrowding causes uneven cooking.
Step 7 — Cook First Side
COOK for 7 minutes until the edges begin turning golden and you hear steady sizzling. 👂
Step 8 — Flip the Chicken
FLIP each piece using tongs and cook another 6–8 minutes until internal temp reaches 74°C / 165°F. 👁️
⭐ PRO TIP: Insert thermometer into the thickest part for accuracy.
Step 9 — Rest the Chicken
REMOVE chicken and let it rest for 5 minutes until juices redistribute and the surface glistens. ✋
⭐ PRO TIP: Resting prevents juices from spilling out when sliced.
Step 10 — Slice and Serve
SLICE against the grain for 1 minute until pieces look juicy and tender inside. 👁️
How Do I Know It Is Done?
- 👁️ LOOK: Golden edges with a slightly crisp exterior
- 👂 SOUND: Gentle sizzling fades as cooking finishes
- 👃 SMELL: Savory, roasted aroma—not sharp or raw
- ✋ TOUCH: Firm but slightly springy when pressed
- 👅 TASTE: Juicy, well-seasoned, no dryness
If Something Looks Wrong
- Chicken looks pale → Cook 2–3 more minutes
- Edges too dark → Lower temp next time
- Juices run pink → Needs more cooking
Pro Tips & Common Mistakes
💡 Pound chicken to even thickness for consistent cooking
💡 Let seasoning sit 5 minutes before cooking for deeper flavor
💡 Use a meat thermometer—guessing leads to dry chicken
💡 Don’t skip resting—it’s critical for juiciness
💡 Flip only once to maintain crust
💡 Clean basket between batches to prevent burning residue
Common Mistakes
| ❌ Common Mistake | 😬 What Goes Wrong | ✅ How to Fix It |
|---|---|---|
| Overcooking | Dry, tough chicken | Use thermometer |
| Skipping preheat | No browning | Always preheat |
| Crowding basket | Uneven cooking | Cook in batches |
| Not drying chicken | Steamed texture | Pat dry thoroughly |
| Cutting too early | Juices leak out | Rest 5 minutes |
Variations & Substitutions
| 🔄 Variation | What to Change | Flavor / Result |
|---|---|---|
| Vegan Version | Use tofu slices | Crispy outside, soft inside |
| Gluten-Free Version | Already GF | No change |
| Extra Spicy Version | Add cayenne | Bold heat |
| Budget Version | Use chicken thighs | Juicier, richer |
| Restaurant Upgrade | Add butter finish | Rich, glossy flavor |
| Kid-Friendly Version | Reduce spices | Mild and simple |
The restaurant upgrade version stands out—finishing with a small pat of butter and lemon elevates the dish into something you’d expect at a bistro.
Nutrition Information
| Nutrient | Amount per Serving |
|---|---|
| 🔥 Calories | ~280 kcal |
| 🥩 Protein | 35g |
| 🍞 Carbs | 3g |
| 🧈 Fat | 12g |
| 🌾 Fiber | 1g |
| 🍬 Sugar | 1g |
| 🧂 Sodium | 450mg |
This recipe shines for its high protein content, making it ideal for muscle maintenance and satiety. It’s low in carbs and uses minimal oil, which many health-conscious eaters appreciate. These macros fit well into balanced diets like keto, low-carb, or general healthy eating.
Nutrition values are estimates only and may vary based on exact ingredients used and portion sizes.
Storage & Reheating Guide
| 📦 Method | ⏳ Duration | 💡 Best Practice |
|---|---|---|
| 🌡️ Refrigerator | Up to 4 days | Store in airtight container |
| ❄️ Freezer | Up to 3 months | Wrap individually |
| 🔥 Stovetop | 5 minutes | Add splash of water |
| 📦 Microwave | 1–2 minutes | Cover to retain moisture |
Meal Prep Win
Cook a batch at the start of the week and slice into portions. Store in airtight containers for salads, wraps, or bowls. You can pre-season chicken ahead of time to save even more effort. The flavor actually improves slightly after resting overnight.
Serving Suggestions
- 🥗 Caesar salad — adds protein and balance
- 🍚 Garlic rice — absorbs juices beautifully
- 🥪 Chicken sandwich — perfect sliced thin
- 🥦 Roasted broccoli — adds texture contrast
- 🌮 Chicken tacos — versatile and flavorful
- 🍋 Lemon herb quinoa — light and refreshing
Restaurant-Style Plating Guide
- Use contrasting colors like green herbs
- Stack slices slightly for height
- Place garnish intentionally, not scattered
- Drizzle juices lightly for shine
Make It a Full Meal — Complete Menu Ideas
🍽️ Weeknight Dinner for Four
Starter: Tomato soup
Main: Chicken
Side: Rice
Dessert: Yogurt parfait
Drink: Iced tea
🎉 Weekend Dinner Party Menu
Starter: Bruschetta
Main: Chicken
Side: Roasted potatoes
Dessert: Chocolate mousse
Drink: White wine
🥗 Light & Healthy Version
Starter: Green salad
Main: Chicken
Side: Quinoa
Dessert: Fruit bowl
Drink: Sparkling water
Reader Questions Answered — FAQ
❓ Can I use frozen chicken?
Yes, but thaw it first for even cooking. Cooking from frozen leads to uneven texture.
❓ How do I keep it juicy?
Use a thermometer and don’t overcook. Resting is also essential.
❓ Can I make it ahead?
Absolutely. It stores well and reheats easily.
❓ Is this beginner-friendly?
Yes, it’s one of the easiest recipes to master.
❓ Can I double the recipe?
Yes, but cook in batches to avoid crowding.
❓ What if I don’t have a thermometer?
Cut into the thickest part—no pink means done.
❓ Can I change the seasoning?
Definitely—try BBQ, Italian, or lemon pepper.
❓ Why is my chicken dry?
It was likely overcooked—reduce time slightly.
Conclusion
You made it—and now you have a foolproof way to cook one of the most versatile proteins perfectly every time. This method delivers juicy, flavorful results fast, making it ideal for busy days and meal prep alike.
Once you master air fry chicken breast boneless, you’ll never go back to dry, overcooked chicken again.